Scan Id Card – Extract Information From ID Card Using Power Automate
Scan Id Card using Power Automate. In today’s fast-paced business environment, efficiency and accuracy in data management are paramount.
Microsoft Power Automate provides a robust platform to automate such tasks, significantly reducing the potential for human error while speeding up the process.
Let’s delve into how we can set up a flow in Power Automate to automatically extract information from ID cards whenever a new file is created.
Step 1: Trigger – When a File is Created
Our automation journey begins with a trigger. In Power Automate, a trigger is an event that starts the flow. For our use case, we want the flow to initiate whenever a new ID card image is added to our repository, which could be a SharePoint folder or OneDrive.
How to Set Up:
- Select the “When a file is created” trigger (Image 1).
- Specify the folder path where the ID card images will be uploaded (Image 2).
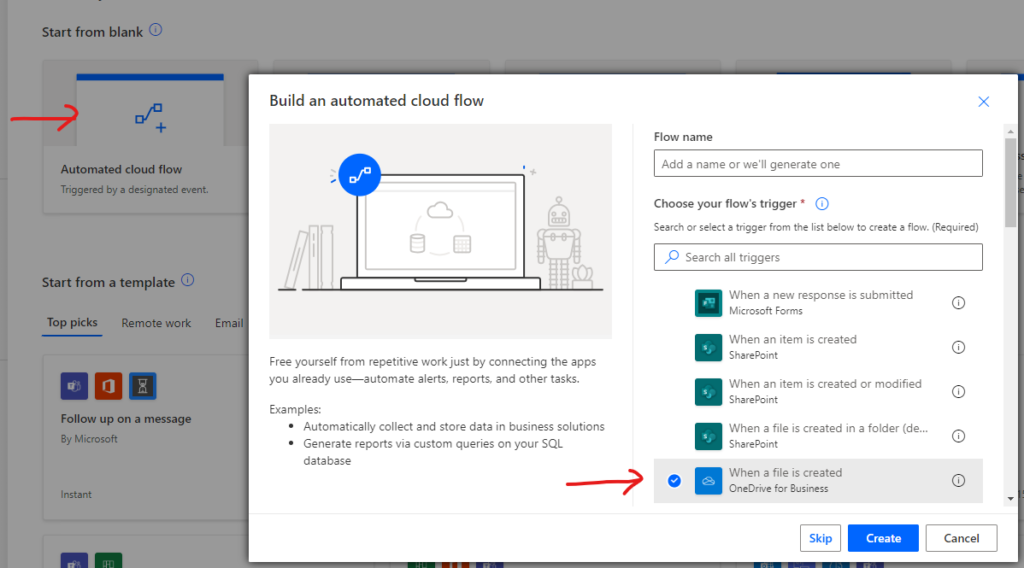
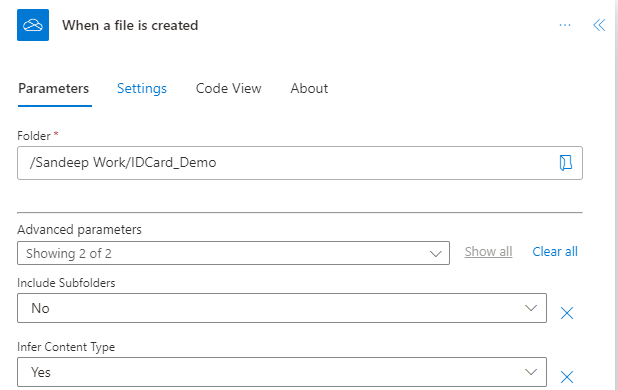
Folder Path – ‘/Sandeep Work/IDCard_Demo’ for demo purposes.
Step 2: Action – Extract Information from Identity Documents
Once a file is detected, we proceed to extract the data. This step involves using a pre-built AI model within Power Automate, which is trained to recognize and extract text from identity documents.
How to Set Up:
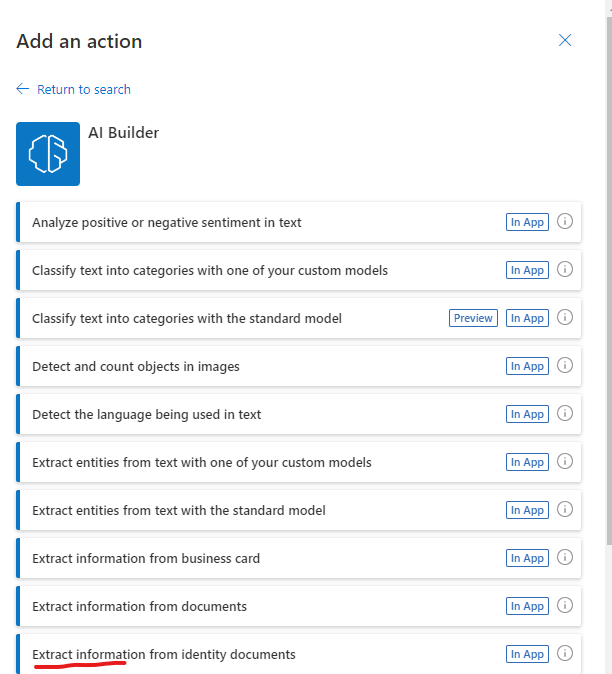
- Add a new action following the trigger, searching for “AI Builder” in the actions search bar and selecting “Extract information from identity documents”, (Image 3).
- Connect to the appropriate AI Builder model, “Extract Information from Identity Documents” pertained model.
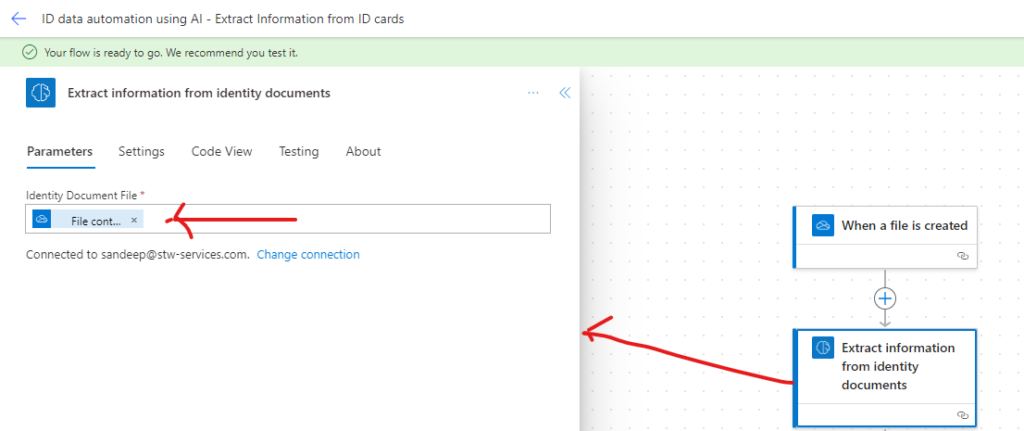
- Point the action to the file content from the trigger (Image 4).
Step 3: Action – Add a Row into a Table
With the data extracted, it’s time to store it efficiently. Adding a row into a database or a table allows us to organize the data, making it accessible and actionable for further processes.
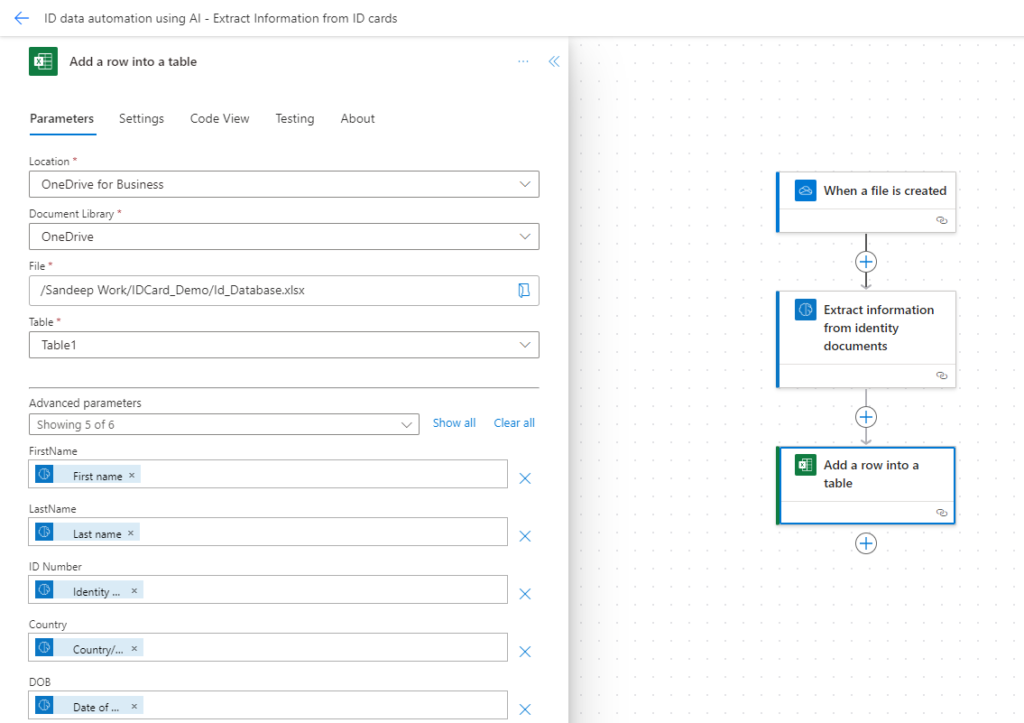
- Choose the “Add a row into a table” action and decide on the destination for the data—this could be an Excel table, a SharePoint list, or a database. For the demo, I added a file in the OneDrive folder ‘Sandeep Work/IDCard_Demo/ Id_Database.xslx’
- Map the extracted fields from the ID cards to the corresponding columns in your table. For example, columns in excel file “FirstName”, “LastName”, “ID Number”, “DOB”, “Country”.
- Map Excel column with extracted information from AI model.
Step 4: Testing flow
How to Test:
- Run flow in test mode and select manually.
- Upload files and check data in excel.

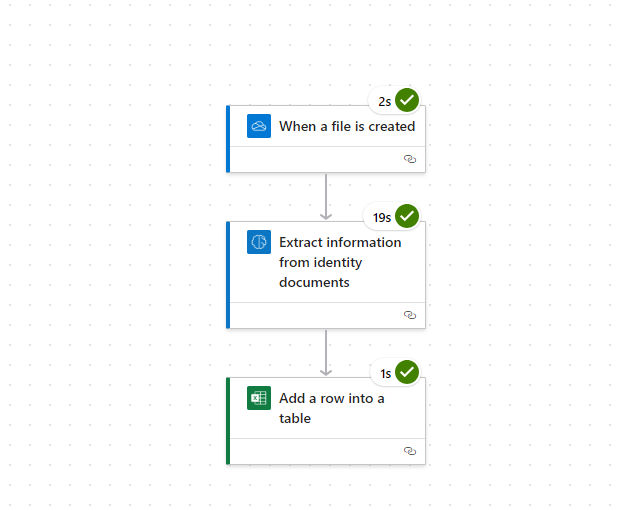
Uploaded file in folder ‘Sandeep Work/IDCard_Demo/’. Flow run successfully
And data in can see in excel file.
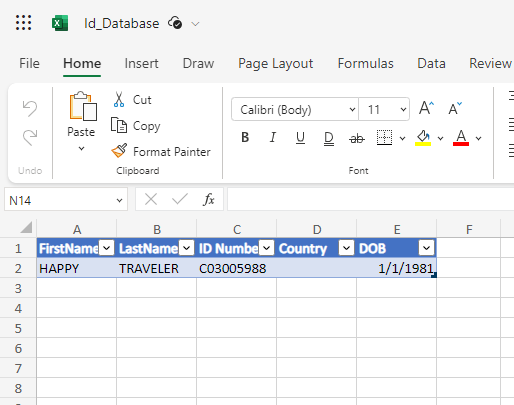
Wow! It worked.
Conclusion –
Please note, the above steps are for demo purposes. The actual configuration may differ depending on the specifics of the documents being processed and the systems in place according to your environment.
For the screenshots, they would be specific to the steps you perform within your Power Automate environment.
This walkthrough is meant to serve as the core content of your technical post, how ID cards can be processed easily to extract information and save in DB or send on email using Microsoft Power Automate and AI builder.
Thank you for reading.
